
A small seed nursery helps you care for young plants before they move into a garden. Start with one tray or a few clean containers and a crop you will use.
Your first task: choose a sheltered, bright spot near water and decide who will check it each day.
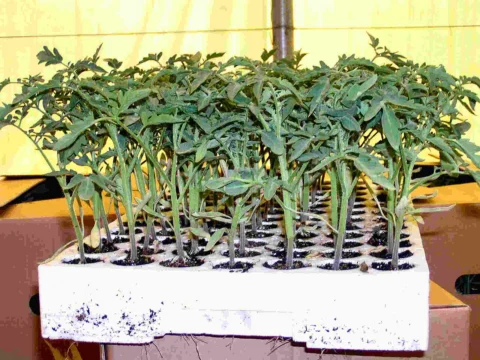

Start with one manageable batch
- Choose the crop and the time it can be planted into its final bed. Read its own growing guide.
- Use clean containers with drainage holes. Never reuse containers that held pesticides, fuel or other hazardous substances.
- Fill with a suitable seed-starting mix. Moisten it before sowing.
- Sow at the depth on the packet, cover gently and label the crop, variety and date.
- Water gently, inspect every day and prepare the final bed before plants become crowded.
Separate cells reduce root tangling. Clean reused food containers can also work if water drains freely. Buying an expensive propagation system is not the first requirement. University of Maryland: containers and seed starting.
Choose light and shelter together
A bright place with protection from harsh wind can be useful. Watch it in the morning and afternoon. A windowsill that looks bright to a person may leave seedlings stretching; a tray beside hot metal can overheat. Adjust shade and position as the plants grow.
Inland cold nights, coastal wind and a sheltered urban courtyard create different conditions. Use nearby growers and the crop guide to choose dates. Northern-hemisphere instructions about a winter indoor start do not set the season for Namibia. Do not buy grow lights just because an overseas guide uses them.
Choose and test your growing mix
A seed-starting mix needs to hold moisture while allowing excess water to leave. A known clean commercial mix can be a useful comparison when testing local materials. Mature compost varies: an attractive-looking batch is not automatically suitable for germination.
The original wiki suggested sieved compost and sharp sand, from one part compost to nine parts sand for fine seeds, up to equal parts for larger seeds. Keep this as an earlier local-library recipe to test, not a universal formula or a verified group result. Label a small trial, compare emergence and drying with your usual mix, and avoid committing scarce seed before seeing the result.
Do not use salty sand or collect material from a site without permission. Very sandy mixes may need frequent watering and later feeding. Repeated losses call for a clean tray and a different, known-quality mix before repeating the same recipe.
Check water, air and space
Look beneath the surface before watering again. A fine flow avoids washing small seeds into heaps. Let excess water escape; an undrained saucer can keep roots wet even when the surface appears dry.
A clear cover may retain moisture while seeds germinate, but can trap dangerous heat in direct sun. Remove it as seedlings emerge and watch ventilation. Do not copy a heated mini-greenhouse routine into a hot Namibian yard. Thin or separate crowded seedlings carefully and support the roots. University of Minnesota: seedling care and handling.
Solve the common problems
- Nothing emerging: check the expected germination time, seed age, depth and moisture before resowing.
- Long, pale stems: review light and crowding. More fertiliser is not a substitute for light.
- Seedlings collapsing at the soil surface: isolate the affected tray and review hygiene, moisture and airflow.
- One side drying first: look for wind, strong afternoon sun or uneven watering.
- Roots filling every space: prepare to transplant or move into a suitable larger container.
Seedling diseases can spread through contaminated growing mix and shared water. Do not reuse a diseased batch of mix for another sowing. Recognising and preventing damping off.
Help seedlings move into the garden
Gradually expose seedlings to their destination’s light and wind. Keep checking water; do not harden plants by deliberately making them collapse. Prepare the bed and water before lifting. Support the roots and plant at the depth recommended for that crop.
Carrots are usually best sown where they will grow, rather than handled like tomato transplants. Some other crops also dislike root disturbance. Use the vegetable overview to find the crop’s own instructions.
For a shared nursery, write the crop name and care instructions on a label that travels with the plant. Agree who will water after delivery. A seedling handed out is only the start of the growing job.
Watch how a nursery is organised
 Watch videoBuild a nursery & grow trees — Community Forests International
Swahili with English subtitles; exact filming country is not confirmed in the World Agroforestry catalogue. This is a tree nursery demonstration. Watch the organisation and plant care; do not copy its tree choices or watering into every Namibian site.
Choose your next step
- Organise a community tree nursery
- Try air-pruning for tree seedlings
- Grow tomatoes
- Share seeds and the growing knowledge
Share your region, shade, growing mix, crop and result with the Living Earth community. A photograph of the roots and a short note about watering can help someone adapt your method.