
Orchard layout is a long-term decision. Row direction matters, but it must be considered alongside slope, adult tree size, irrigation and the space needed to harvest, prune and move safely.
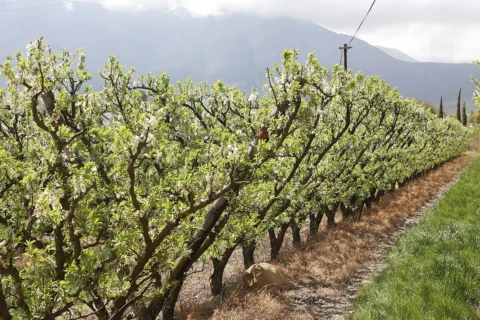

From the Namibian discussions
A Namibian grower described choosing north–south rows so each side received sun at different times, while also considering airflow. Keep that reasoning as a local design example. It is not a rule that every orchard should follow regardless of slope, prevailing wind or training system.
Draw what already exists
Before setting out rows, mark the boundary, existing trees, buildings, water points, drainage and paths. Draw north and note the sun and shadows through the day. ABC’s orchard guidance emphasises allowing for mature size and preserving light; its examples are useful design prompts rather than a universal planting grid.
Test two layouts on paper
- Sketch the proposed adult canopy sizes and the working space between them. Use the rootstock and training system’s recommendations.
- Compare at least two row arrangements for shade, wind exposure and access. Include where equipment turns or harvest containers wait.
- Mark where irrigation can be isolated, flushed and repaired. Check pressure and elevation before assuming equal water delivery.
- Consider how storm runoff crosses the site. On a slope, do not orient rows solely for sunlight while ignoring erosion and safe drainage.
Walk the future orchard
Use temporary markers to represent trees and paths. Visit in strong sun and ordinary windy conditions. Ask someone to carry a harvest crate through the proposed layout. A drawing can conceal a narrow gate, awkward slope or shaded corner that becomes obvious on foot.
Leave room to learn
Planting a first section can reveal watering and management problems before the whole site is committed. Keep cultivar, rootstock and planting dates on a map. Record the water each section receives and make changes deliberately, so poor performance is not blamed on row direction when the actual cause is irrigation or soil variation.
Namibian climate and microclimate
Cold air drainage, hot afternoon exposure and prevailing wind vary locally. Winter shadows may be decisive in an urban yard; access and erosion can dominate a larger farm layout. A protected northern site and a frosty plateau site need different assumptions.
Your first practical step
Mark one proposed row and its mature canopy on the ground. Walk it with an experienced local grower before digging permanent holes.
Watch and adapt
Publisher: ABC Gardening Australia
Country and context: Australia; exact filming locality not confirmed.
A layout lesson. Choose locally suitable species and examine sun, wind and water before copying rows or spacing.
The Australian example helps you ask about space and sunlight. Use your own slope, seasonal sun and local rootstock advice to settle the design.
Keep exploring
Sources and further reading
Have you tried this in Namibia? Share the site conditions, method and result—including what did not work—with the Living Earth community. Local observations help the next person adapt the idea.